Weathering a Panzer 38(t)
Door Acrylicos Vallejo

The weathering is started by adding a filter. This is a thinned down wash that blends everything and tones down the brightness to the painting. The filter was made using Oiled Earth Model Wash mixed about 50% water to 50% Model Wash.

The next step was to add some panel darkening. The Oiled Earth Model Wash broke out again for this; applying the wash to the areas which are needed some tonal shading. Do not want to cover the entire model with this wash, just corners of panels and around surface features.

After the wash has been applied, and not allowing it to dry fully, a flat edge brush is used that is damp with water (Not Wet) and push the bristles back into the wash from the clean area of the model to remove the strong demarcation line left by the wash. In some case a light stippling from a soft-tipped brush can be used to feather out the look if it is too dark.

Here you can see the wash applied to one section of the lower hull of the 38(t). Working with acrylic washes to break the weathering into sections as the washes dry much faster than enamels and if left unattended can leave stain marks that can be very difficult to remove in most cases. As soon as the wash was applied to this section the flat edged brush is used to smooth out the edge between the clean and washed areas.

This is the lower hull with the applied darkening we are looking for.

The next thing you wanted to do is to darken the panel lines. Take a a fine tipped brush damp with water and touch the recessed areas, then with a tiny amount of Dark Grey Model Wash, touch the recess and let the capillary action of the fluid take over and the wash spreads throughout the joint.

You can do all washes then start the next step in weathering using pigments. In this case simply work each section, completing it before moving on. Here a glass eyedropper is used to add a few drops of water to the Light Sienna Pigments and mix.

The pigments are then applied in a controlled manner around all raised features. If the mixture is just thick enough it will stick nicely to the areas and allow you to quickly move around the entire area.

Here the pigments are applied, as mentioned, around all of the surfaces you want to see deposits of dirt and dust that gets stuck in the crevasses. You can see that some of the pigments are beginning to dry nicely by their lighter coloring.

Once fully dry, a stiff bristled brush was used to essentially scrub the areas where the pigment was placed. Going back and forth as well as drawing the brush to the open areas two things are achieved at this point; first is deposits are left in the creases and some of the dry pigments are transferred to the open areas and give the lightly dusted appearance to the surfaces.

For areas that may be to defined or heave, take a flat brush, damp with water and lightly wash the area.

Once the pigments have been applied around the raised surfaces if you want to add more depth to the appearance. This is achieved by using the same pigment mix made with water and with a flat edge brush, lightly flick the mix onto the surface. This process is followed by flicking lightly one or more of the Model Washes onto the surface.

Here we see the added pigments in the creases as well as the splattered effect begin to show up.

Once the lower hull was done, the process was more or less repeated throughout the model. Natural Umber pigments are added in a limited amount for some variation in the coloring of the dirt as well as pin washes and spatter with European Dust and Dark Rust Model Wash. Again, the different colors add tonal variations and depth to the finish.

Once pigments are applied you can then step back and look to see how you are doing. Taking pictures of you work and examining them on you computer is a great way to see things that you might want to correct.

Here you can see the color variations beginning to come out with the applications of different pigments and several different washes.

To add a steel finish shine to the edges of worn areas, the Dark Steel Pigment is rubbed onto the surface with either a makeup applicator, you finger or a variety of soft tools that can pinpoint the application.


By adding layer after layer, the depth is brought out in the model. The base was also created using Vallejo Pigments. A mixture of plaster, actual sand and varied pigments, a smooth paste is created and placed onto the base and allowed to dry.

While still a little damp, go over the areas you want to have a more dirt-like appearance with dry pigments, lightly stippling the surface. They will attach to the damp mix and give the rough dirt look you see both in the road surface as well as the grassy areas.

Adding some tufts of grass and various objects like the two boxes you see here from Value Gear can bring a piece alive.
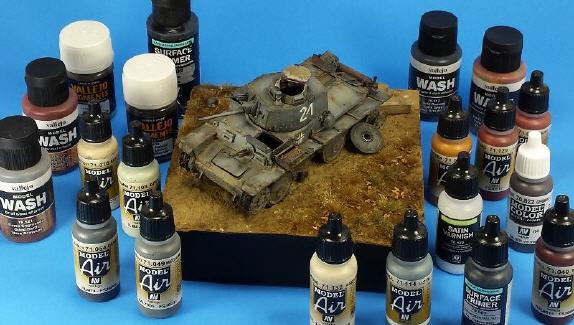
The finished Panzer 38(t). Thanks for stopping by and having a look!!